Welcome to Part 1! Here I will teach you the basics of Google Flights and how to use its search filters to find the flights that match your preferences perfectly. At the end of this page, you will already be able to find and book your own flights.
Alright, now let’s get started!
When you first go to google.com/flights, this is what you will see:
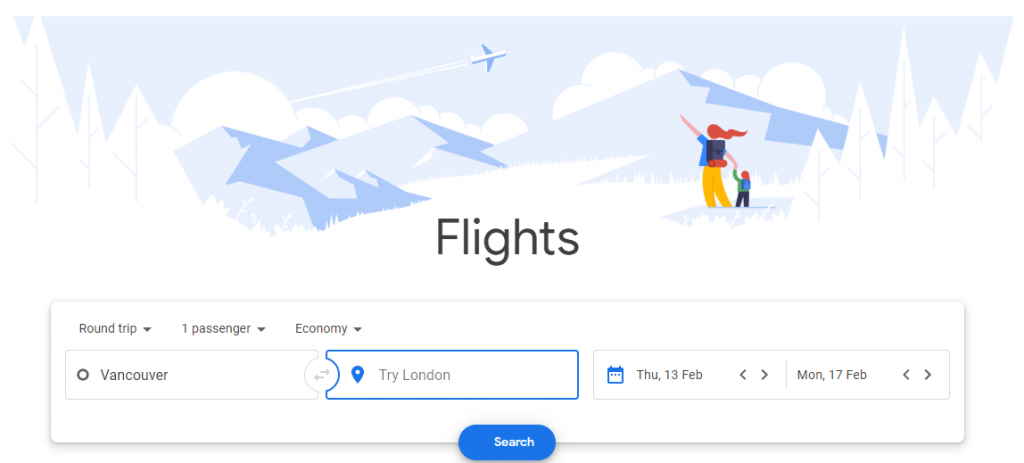
Google automatically puts the city that it detects you to be in as the departure point as well as search settings for Round Trip, 1 Passenger, and Economy.
If you are planning to buy one-way tickets, traveling with other people, or wish to fly in Business class, then all you have to do is select those options from their respective drop-down lists before making your search.
Input the destination you wish to go to and the dates you wish to travel on and click search!
For the purposes of this guide, I will be looking for a roundtrip flight ticket for 1 passenger in economy class from Vancouver to London to demonstrate how Google Flights works. I am searching for flights one month ahead of time.
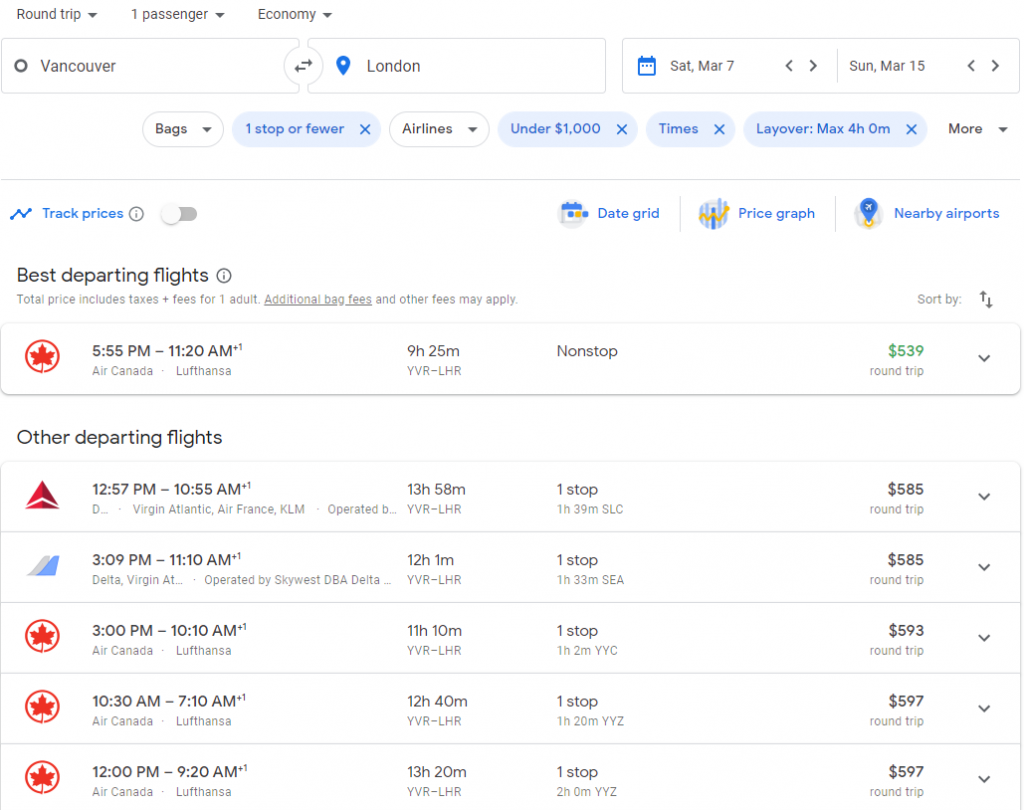
Upon clicking search, you will be taken to a page which lists all the flights available for your search which looks like this:

As you can see, Google Flights has presented us with a list of available outbound flights automatically ordered by what it considers to be the best flights available. This is usually a combination of the cheapest and most convenient flights.
If you click the arrows next to Sort by:, you can change the order to go from cheapest to most expensive (Price), earliest to latest departure (Departure Time), earliest to latest arrival (Arrival Time), or shortest to longest (Duration). Let’s stick with the order Google thinks is best.
You can also change the language, country, and currency shown by opening the menu found by clicking the 3 lines in the top-left corner of the page or by scrolling to the bottom of any Google Flights page and changing the settings there.
*Note that even though right now we can only see the details for the available outbound flights, the prices displayed are the total prices for a roundtrip ticket, not just the outbound journey. The moment we select an outbound flight, we will get the details for the possible return flights. The reason we don’t see the return flights now is because there could be more than one option available for them.
But before we start booking anything, let’s customize our search result by playing with some of the filters that are offered:

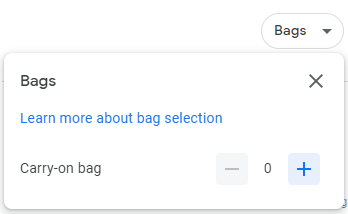
However, I’ve found that this filter doesn’t work perfectly and some flights actually get filtered out instead of just having their total price updated by adding the cost of a carry-on so I would actually avoid this filter for now and just factor in the cost of a carry-on bag later if needed.
Some airlines these days (especially the budget and low-cost ones) have started charging passengers extra for their carry-on bags, only allowing them to bring a small personal item such as a purse or laptop bag on board with them for free. To learn more about how to deal with these kinds of airlines, check out my Guide to Budget Airlines.
Let’s carry on! (see what I did there?)
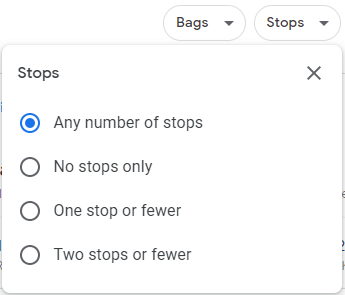
The next filter is the Stops filter and has to do with how many stops you’re okay with your flight having. Sometimes you can find cheaper flight itineraries if you’re willing to include extra stops on your journey, but it comes at the cost of convenience.
Similarly, you can also choose to only see direct flights if you prefer not having to deal with the hassle of stopovers, but since this is a long-distance flight, I’m okay with one stop if it saves me money. A break between lengthy flights wouldn’t be so bad so I will select the “One stop or fewer” option.
This has already had an effect on my results as the price for the cheapest outbound flight in my initial search has increased a little bit, most likely because the return flight at that price had 2 stops (more on that later). Let’s keep going!
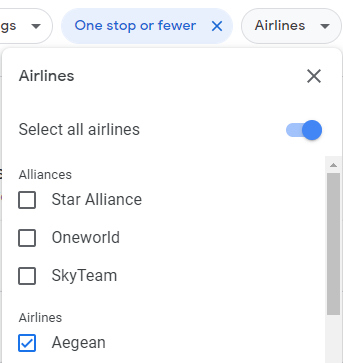
The Airlines filter lets me decide whether or not I only want to include certain airlines in my results or perhaps remove some others. It also lets me filter by specific airline alliances. I personally don’t care which airline I end up taking as I usually care most about prices, but if you collect points with one specific airline or alliance, then this could be a useful filter for you.
I will not change anything in this filter for the purposes of this demonstration as I’m not trying to collect any points nor do I prefer one airline over another for any reason.
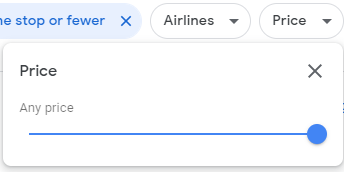
For this particular search, the lowest I can set the filter to is $1,000 and I don’t want to spend more than that on my flights anyways so I will choose that as my maximum price.
Doing this has now filtered out 20 of the total flights in my search results, keeping only the affordable ones!
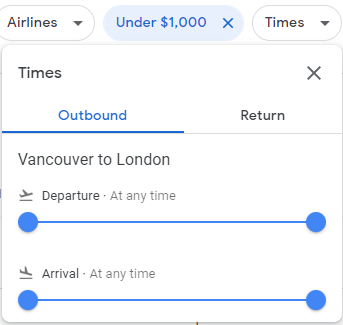
The next filter is the Times filter and what it does is let you filter out flights that depart or arrive too early or too late for you. By moving the sliders around, you can affect both your outbound and return flight search results.
If you have to work in the morning or you prefer not arriving too late in your destination city, this filter can be helpful in finding the flights that fit around your schedule.
I personally don’t like arriving too late at night in my destination city since I might not know the area and don’t want to be stranded at the airport so I will filter out flights that arrive after 9pm from my demonstration search for my outbound flight.
Since most flights from Vancouver to London are overnight, they arrive in the morning/afternoon so this hasn’t affected my results much, but it’s good to have for other destinations.
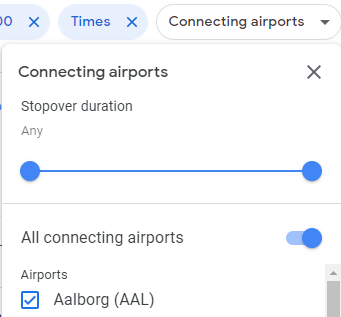
This next filter is kinda like two filters in one. The first thing the Connecting Airports filter lets you do is decide how long or short you want your layover to be if you do end up choosing a non-direct flight. Adjusting the sliders will filter out any flights that have too long or too short of a layover duration for you.
The second thing it lets you do is select specific airports that you’d want your layover to be in. For my demonstration search, there aren’t any airports I’m trying to stop in, but if I must have a layover, I prefer it to not last longer than 4 hours at most so I will adjust the slider accordingly.
Doing this has taken out almost 30 flights from my results! There is one last filter available, however.
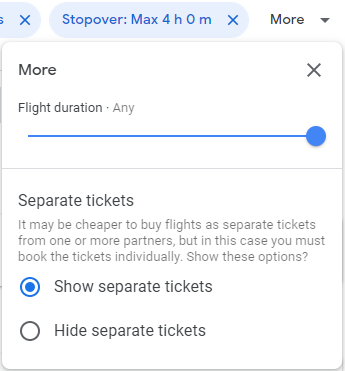
Finally, the More menu has two filters in it. The Flight Duration filter lets you decide how long you want your total trip duration to be for your outbound and return flights. This filter is great to use if you’re okay with multiple stops and want to include them in your search results, but still don’t want to travel for too long.
However, since I’ve already filtered out trips that have more than one stopover and stopovers longer than 4 hours, it’s very unlikely that my results will change by adjusting this filter unless I really don’t want to travel for longer than a few hours more than a direct flight so I’m going to leave it as is.
The second filter available here lets me decide whether or not to show flights where I’d have to book two separate tickets. If the separate tickets are for each journey (i.e. one ticket for the outbound journey and another one for the return journey), then there is no downside, but if they are for the same part of the trip (i.e. two separate tickets for the same journey, outbound or return), then it’s a bit riskier and more complicated.
I go into more detail about this in Part 1 of my Guide to Cheap Flight Strategies.
I’ll keep it on for this search. Let’s take a look at what my final search results are after implementing all those filters!
When I compare these results to those I found without adding the filters, the changes aren’t that big. Most of the flights that were in the top 5 in my original search are still in my results and that direct flight is only $12 more now than in my original search.
However, what I’ve accomplished by adding the filters is ensuring that the flights that I am being shown fit my requirements exactly as I want them to!
Imagine trying to tell your travel agent about all these preferences!
It’s so much easier to just do it all yourself and I personally love being able to customize every detail of my flights and having the chance to see all the options available to me instead of just being presented a package by someone else.
Now before I direct you to Part 2 of this guide, I just want to finish showing you what it looks like when you’re searching for round-trip tickets. It seems like the first outbound flight in my results is the no-brainer choice here so let’s select that one.
This is what we see after choosing that flight:
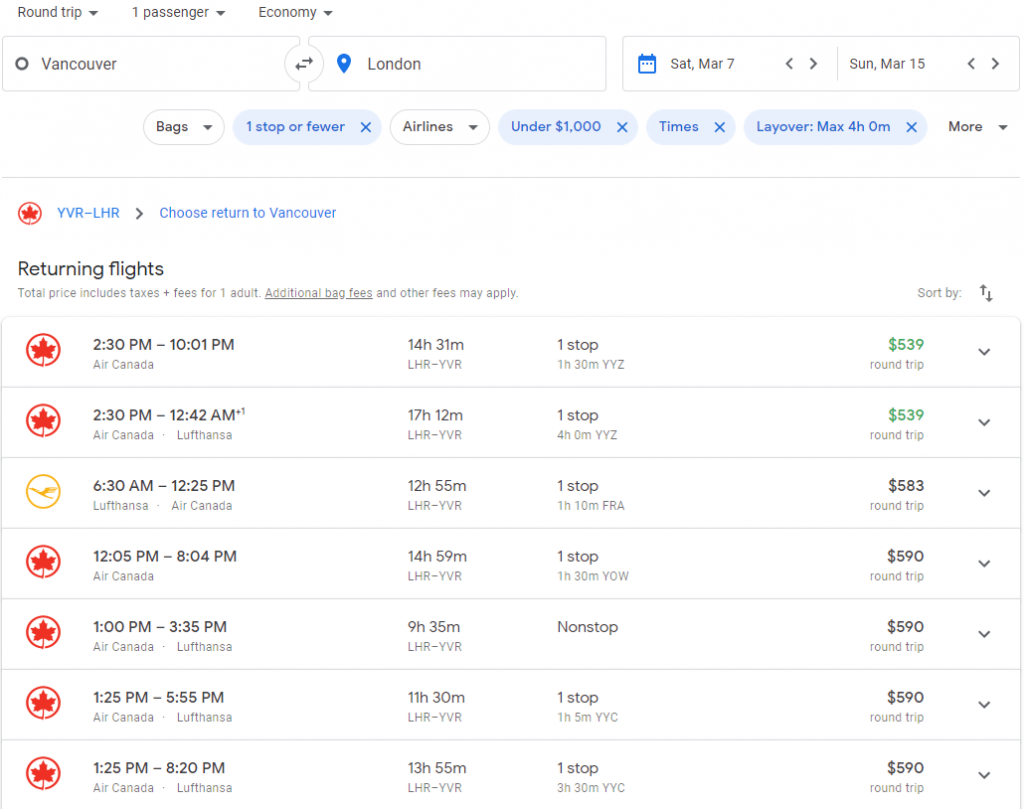
It looks like if I want to get the cheapest price, I’d have to go for a 14.5 hour return flight with a stopover in Toronto for 1.5 hours. However, for $51 more I could save 8 hours and get a direct flight back home. It’s up to you to decide if that’s worth it in your own travels!
Selecting one of these return flights will give me a list of booking options to choose from including a few online travel agencies and booking directly through the airlines themselves.
And that’s all you need to get started! With this information, you should be able to find and book the perfect flights for your trips using Google Flights!
“Thanks Sebastian, this is great and all, but I’m actually quite flexible in terms of dates and destinations. Are there other features on Google Flights that I can use to find my perfect flights?”
I’m glad you asked! There is a whole host of other features available to help you find your perfect flights on Google Flights. Please continue on to Part 2 to learn about the Explore Map feature and how awesome it is!