Welcome to Part 2! By now you should already be somewhat familiar with how Google Flights works (check out Part 1 if you aren’t), but in this section I’m going to tell you all about another feature that Google Flights offers that really makes it stand out above the other flight search engines out there! This feature is especially useful if you are flexible with your flight dates and locations.
So without further ado, let’s get right into it!
Note: just like in Part 1, I’m using the US version of Google Flights and all prices you see are in USD unless otherwise specified.
This feature is called the Explore Map. This is one of my favourite features that Google Flights offers and one of the main reasons why I love using it.
Let’s say I want to fly to somewhere in Europe, but I haven’t picked a specific location yet and I’m open to different options. This tool can help me decide where to go in a visually appealing way.
To get to the Explore Map, all you have to do is go to google.com/travel/explore or go to google.com/flights and scroll down and click on the map. This is what you’ll see when you do:
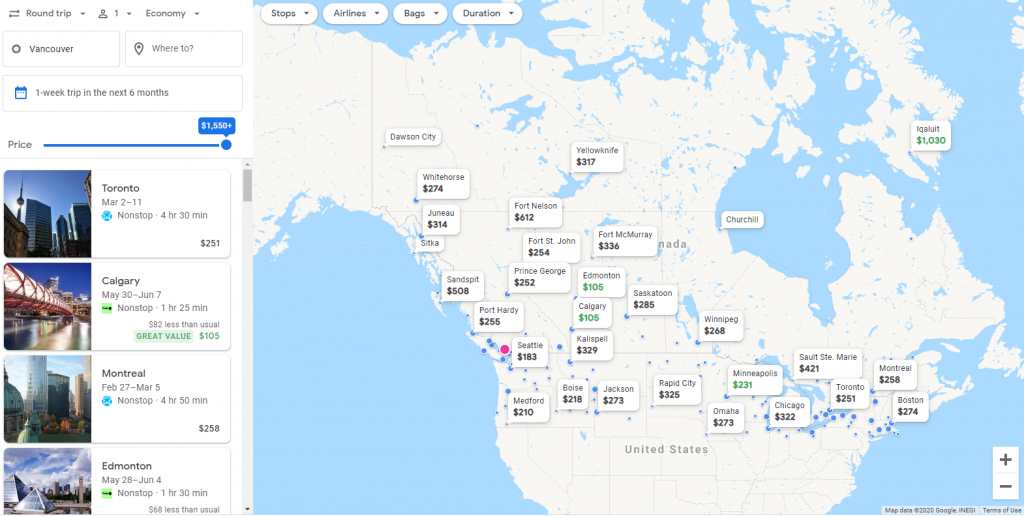
The default map and destinations are customized to your location that Google automatically detects so your map may look different.
Some of the filters I told you about in Part 1 are found at the top of the map and the Price filter is on the left. But before we discuss anything else, let’s move the map to show destinations in Europe. You can do that by simply dragging the map over to get there!
Whenever you move the map, the destinations and prices update automatically for you:
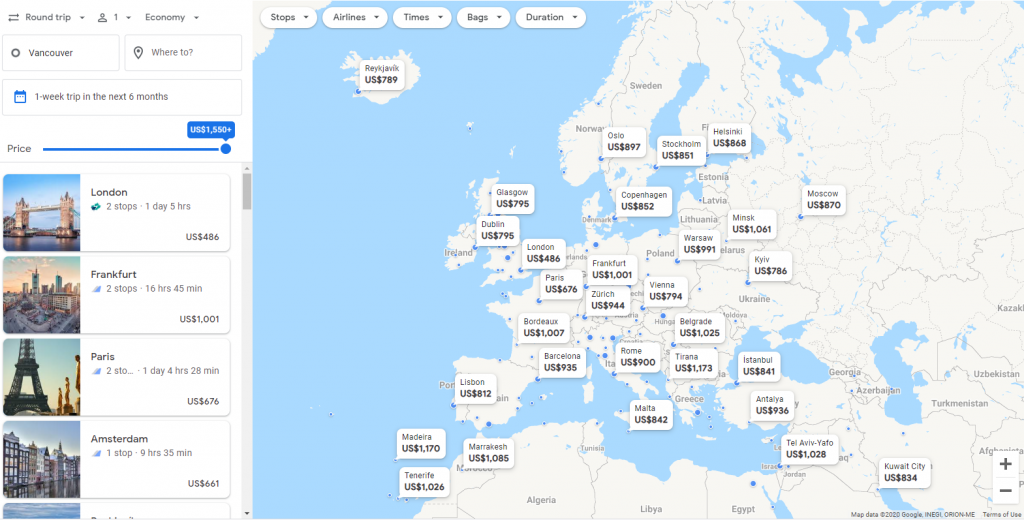
So let’s talk about what we see here. On the left we have the default search settings for 1 passenger round-trip in economy class departing from Vancouver (my location) for 1 week in the next 6 months.
Below that, we have the Price filter as well as some suggestions offered by Google Flights.
On the right, we have the map with each destination highlighted with its price.
If you click on any of the suggestions offered by Google Flights or on any of the destinations on the map, the left side will update with a brief look at the flights available for that destination for the best time period available. You can click View Flights if you want to see more details about those flights.
Before we get ahead of ourselves though, let’s talk about the dates in the search settings. If you click on the field where it says “1-week trip in the next 6 months”, you’ll see this:
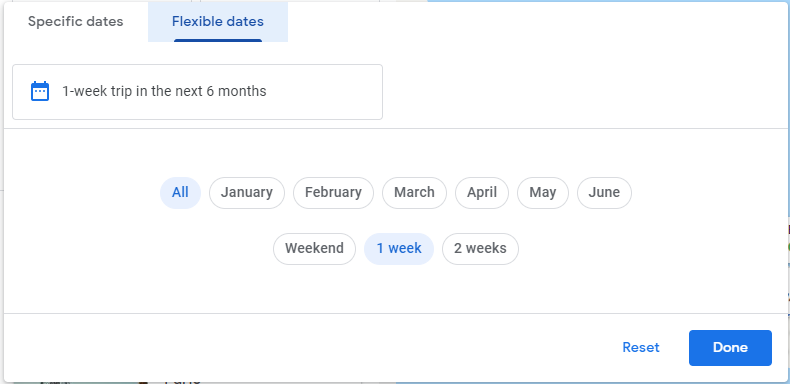
If you’re super flexible or just want to see the best possible deals available to you over the next 6 months, you can leave this as is, but most of the time, you will be limited to the dates you have available for your travels so you’ll want to set this field accordingly.
You can select the month you want to travel in and the length of the trip you’re interested in to let Google show you the best deals for each destination for that time period, but if you’re looking for something a bit more specific, then you’ll need to click on Specific Dates.
Select your dates and click done to update the map accordingly. I’m going to use the same dates I used in Part 1 to see what other options are available to me in Europe for those specific dates.
I’m also going to use the same filters I used in that search to make sure I get the type of flight I’m looking for:
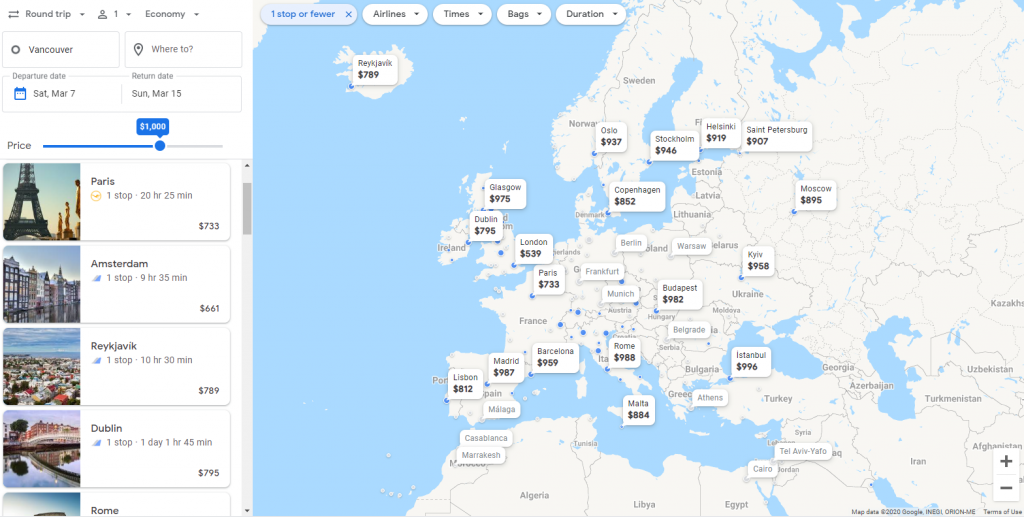
As we can see my options have become more limited as many of the destinations in Europe have become greyed out, mostly because my price filter is set to $1,000. Also, one filter that isn’t available for the Explore Map searches for some reason is the Connecting Flights filter.
Since I can’t edit that filter, I get flights such as the one you see listed for Dublin which are much longer than I’d like. Luckily, I can get around that by adjusting the Duration filter to show me flights that are less than a certain number of hours so I will do that to avoid any flights that are too long.
So we’ve got several options here, but let’s say I’m undecided and I don’t want to spend too much money. The best way to filter out even more options is to adjust the Price slider by one point each time and look at the map to decide if you are satisfied with the options available at that price point.
In my case, I’m going to adjust it to $900. I will also zoom in to the map since there aren’t any options available on the outskirts of Europe (with the notable exception of Reykjavik in Iceland, but I’m saving Iceland for the summer ;) ). Here’s what we got:
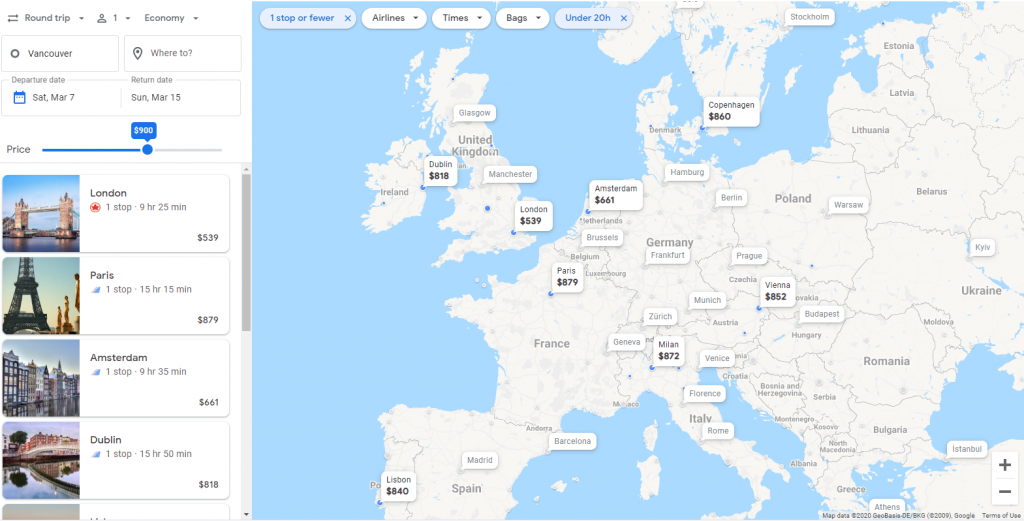
As you can see, we have a few more options available to us now (some of them are really small blue dots so we have to keep a sharp eye out for those ones). If you hover your mouse over the little blue dots, you can see the name of the city and the price for it.
One thing I wish Google would do is prioritize the cities that are blue and available over the greyed-out ones in searches like these because some of the options are actually hidden behind other city names or just made to be smaller blue dots so I have to zoom in to see them, but I digress.
So London is still by far the cheapest destination for me to go to, but some other notable options available to me now include several European capitals, Krakow in Poland (one of my favourite cities in Europe), a few cities in Northern Italy (like Milan and Verona which is very close to Venice) as well as a few more cities in the UK!
I love Krakow and Poland so I’m going to select that as my destination. If I click on the little blue dot in Southern Poland, this is what I see:
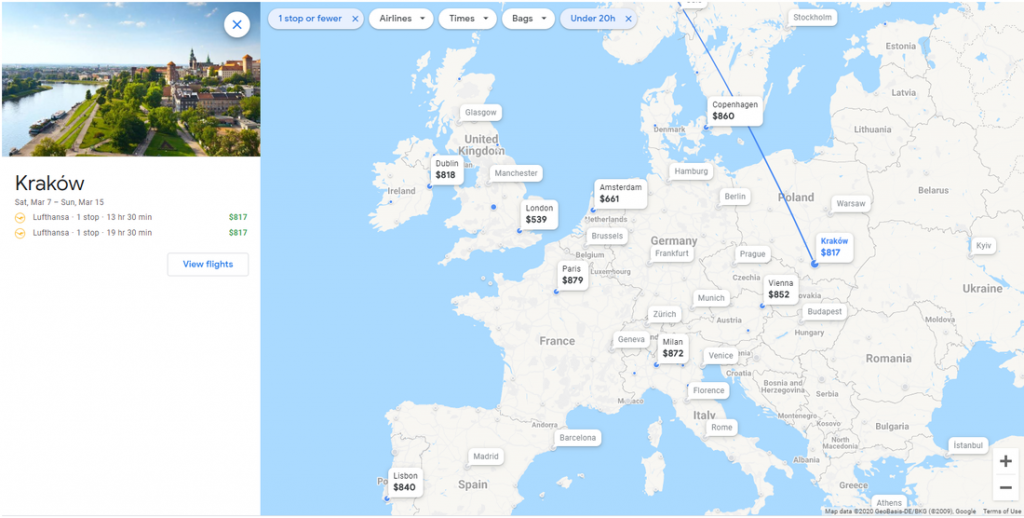
I get a glimpse of the flights available to Krakow that pass my search filters as well as a button to see more details about them. If I click View Flights, it takes me to the main Google Flights search page that we went over in Part 1 which is where I can see all the details about the flight and even book it!
And that’s all there is to the Explore Map! You could spend hours playing with this.
By the way, see how this flight to Krakow is $817? If you’re a budget traveler and don’t mind changing airports in a stopover city or adding another 5-10 hours to your flight itineraries, I can show you how to get to Krakow for the same dates for $200 cheaper ($150 cheaper with a carry-on bag) by combining flights with budget airlines.
Learn how in Part 1 of my Guide to Cheap Flight Strategies where I tell you about a strategy I call split-ticketing. The strategies I teach you in that guide can also be used to go to any other destination on the map above for cheaper too!
But there’s still more to learn! In Part 3 I teach you how you can find the best deals for flights if you have even a little flexibility with your dates by using the Date Grid & Price Graph features. See you there!

